VS Code is a popular code editor used by scientists and software developers alike. Whilst 2i2c cannot host VS Code Server as a service due to the terms of the VS Code Server license, there are alternatives such as code-server that are not subject to these restrictions. As such, 2i2c recommends deploying code-server for communities that wish to run VS Code on their Hubs.
Install the necessary packages
The code-server package is distributed by several packaging repositories, including conda-forge and the Debian/Ubuntu repositories. For most users, we’ll recommend adding code-server to the Conda/Mamba environment definitions. In addition, we can use jupyter-server-proxy and jupyter-vscode-proxy to launch and proxy the code-server web service through the Jupyter Server application.
Let’s modify the environment.yml file that we created in the advanced image creation guide:
1 2 3 4 5 6 7 8 9 10 11 12 13 14 15 16 17 18# This is the standard conda configuration file. Use this file to list # the conda packages that you need installed in your environment. channels: - conda-forge dependencies: - jupyter_contrib_nbextensions==0.5.1 # Required until https://github.com/jupyterhub/repo2docker/pull/1196 is merged - jupyterhub-singleuser>=3.0,<4.0 # Set default python version to 3.10 - repo2docker sets it to 3.7 instead by default, # which can limit us to older package versions - python=3.10 # Everyone wants to use nbgitpuller for everything, so let's do that - nbgitpuller=1.1.* # Add other packages here - code-server>=4.0 - jupyter-vscode-proxy - jupyter-server-proxy
Install extensions
Typically, users will want to install extensions on top of the base code-server instance. Whilst extensions in the VS Code Marketplace are not permitted to be used outside of Microsoft’s VS Code products
Microsoft prohibits the use of any non-Microsoft VS Code from accessing their marketplace.
There is an alternative marketplace for open source extensions at https://code-server for each extension ID. This can be done inside the Dockerfile building the image, or using a postBuild script. The following can be added to a postBuild file in the root of your image Git repository:
#!/bin/bash

set -euo pipefail

# Define packages
declare -a packages=( ms-python.python svelte.svelte-vscode )

# Install them
for package in "${packages[@]}"
do
  echo code-server --install-extension "${package}"
done
Fix proxying of applications
code-server ships with a built-in proxy for exposing local web-servers via the VSCode URL. However, in order to ensure that the activity from applications proxied by VS Code contribute to the activity metrics of the server, we want to use the jupyter-server-proxy mechanism for this. This can be done by defining the VSCODE_PROXY_URI environment variable, e.g. in the start file. Consider adding the following to a script file in the same directory as the postBuild file that we added earlier.
#!/bin/bash

set -euo pipefail

# Set proxy URI template
export VSCODE_PROXY_URI="../proxy/absolute/{{port}}/"

# Start true entrypoint
exec "$@"
Test the image
Once you have the tag of the newly built image (repositories created from the advanced hub image guide automatically build images when the main branch is updated), you can test it out on your hub. You should see a VS Code entry in the JupyterLab interface:
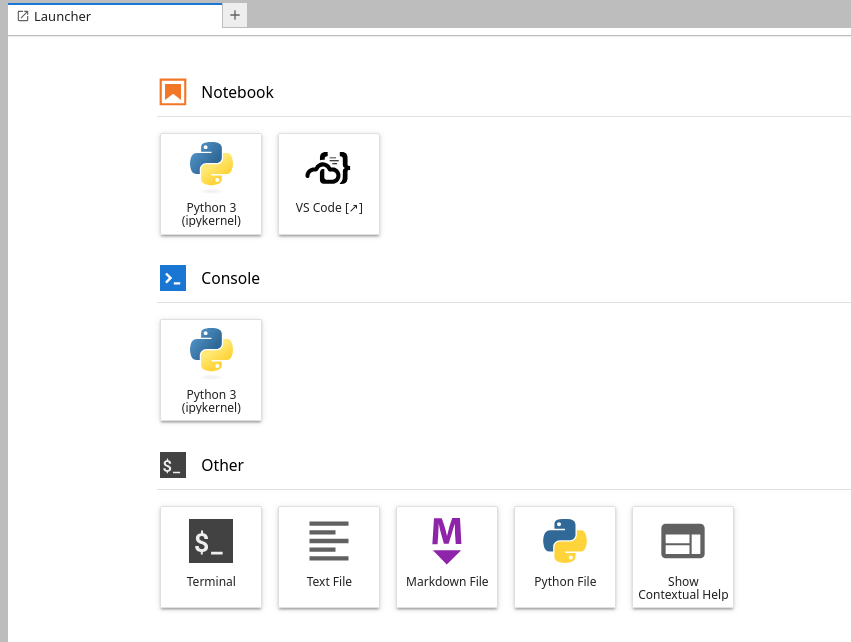
Example of launcher icon for VS Code in Jupyter Lab.
or you can update the default URL by following the guide in Alternative user interfaces.