The recommended way to move code in and out of the hub is with GitHub.
A typical pull request git workflow (GitHub flow docs) for collaborating on code consists of:
Pulling code from a remote repository on GitHub to a local repository on your hub
Creating a new branch from your local repository for working on your changes
Recording your changes with new commits to your branch
Pushing the branch with changes to the remote repository on GitHub
Repeating steps 3. and 4. until your work is ready to be reviewed
Creating a pull request on the remote repository on GitHub for review.
When you pull and push code to the remote repository on GitHub, you will need to provide your GitHub credentials.
Using gh-scoped-creds
Authorisation to pull and push to GitHub is handled with gh-scoped-creds.
Open a Terminal.
Run the command
gh-scoped-creds.The following prompt will appear
jovyan@jupyter-username:~/my-repo$ gh-scoped-creds
You have 15 minutes to go to https://github.com/login/device and enter the code: XXXX-XXXX
Waiting....
Copy the code from the prompt and paste into https://
github .com /login /device as instructed. Authorise the hub to access GitHub by clicking the green Authorize <name of hub> button.
Install the hub’s GitHub App to allow
gh-scoped-credsfor all or specific repositories you would like to push to that are owned by your GitHub account/organisation, and check thatRead and write access to codeoption is enabled.You should now be able to pull and push to GitHub from the hub without entering your credentials.
Authorisation will automatically expire after 8 hours (or when your JupyterHub server stops), and you’ll have to repeat these steps to renew.
Enabling gh-scoped-creds for your hub
There are some extra steps for Hub Administrators to enable gh-scoped-creds for their hub (requires GitHub organisation owner permissions).
Check that
gh-scoped-credsis not already enabled for your hub by opening a Terminal and runningjovyan@jupyter-username:~$ echo $GH_SCOPED_CREDS_CLIENT_IDIf this returns nothing, then follow the next step. If this returns a client ID of the form
Iv1.xxxxxxxxxxxxxxxx, then go to Step 3.Send a ticket to the 2i2c support desk and log a feature request for
gh-scoped-creds. 2i2c will create a GitHub App and update the hub configuration to make theGH_SCOPED_CREDS_CLIENT_IDandGH_SCOPED_CREDS_APP_URLenvironment variables available in your hub.Install the GitHub App to your GitHub organisation (requires GitHub organisation owner permissions).
Navigate to the GitHub App URL provided by 2i2c, which looks like
https://github.com/apps/<gh-app-name>.Click on the grey Configure button to install the GitHub app.
Select the GitHub organisation that you would like to enable
gh-scoped-credsfor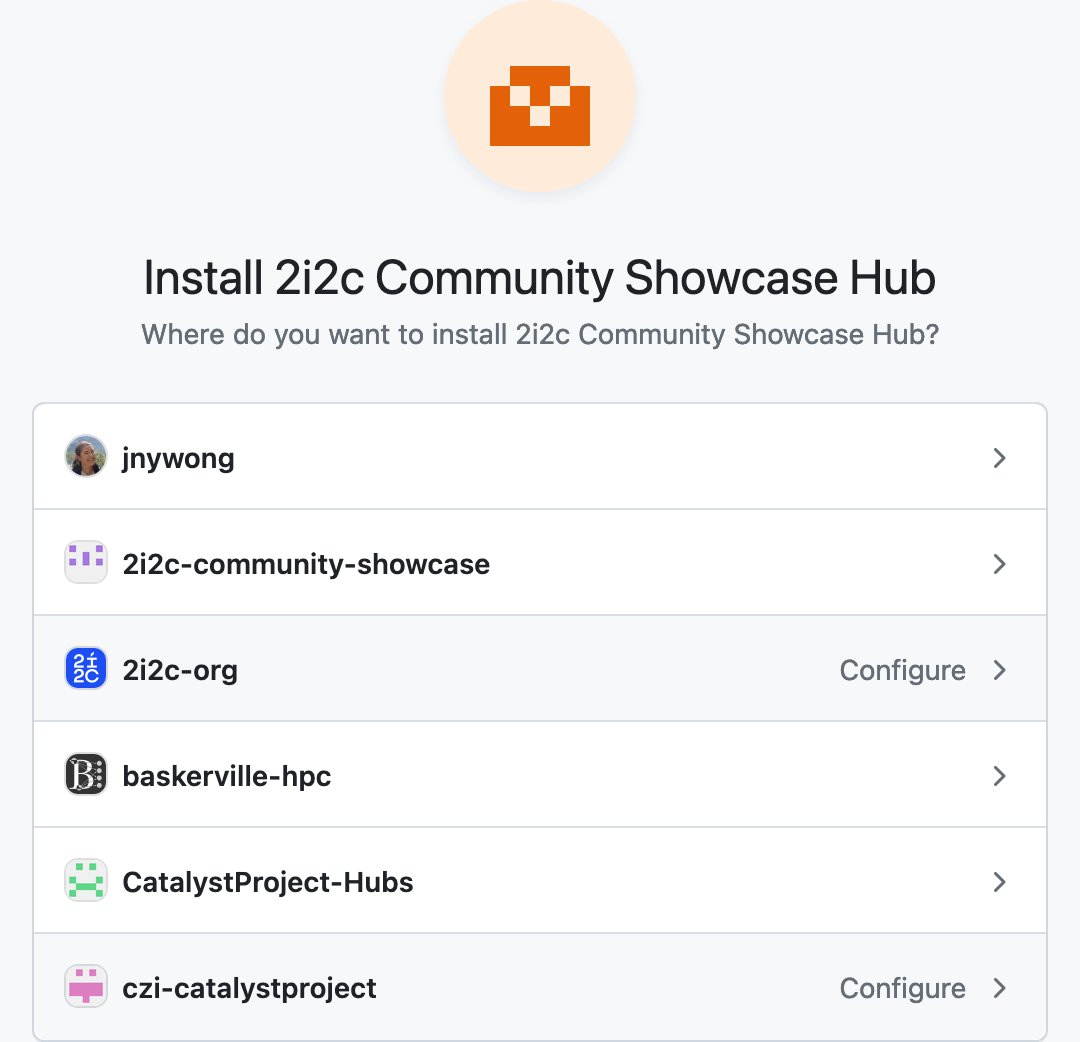
Choose whether to install
gh-scoped-credsfor all repositories in your organisation or for only specific repositories, and check thatRead and write access to codeis enabled.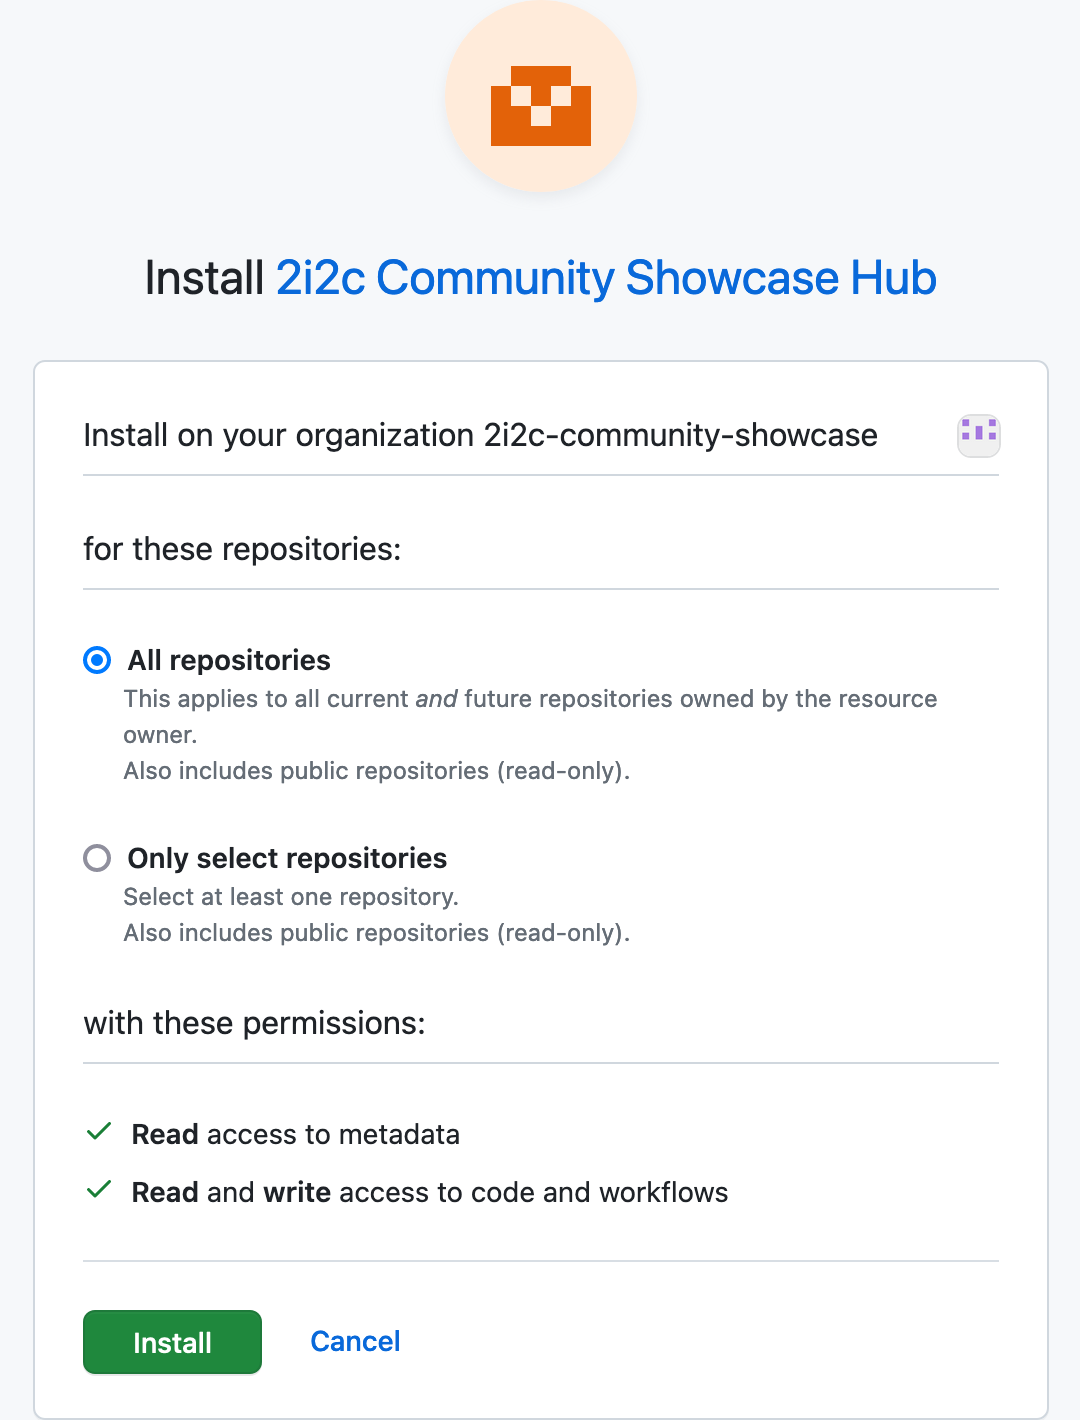
Click the green Install button.
gh-scoped-credsis now enabled for your hub.